Using ZoneRipper with Sonos Music System
The ZoneRipper is ideally suited for use with Sonos music systems.
Follow the "ZoneRipper Quick Setup Guide" to physically connect the ZoneRipper to the same network as your Sonos system.
Typical network configurations for the ZoneRipper and Sonos are shown here.
The Sonos Music Library must be configured to point at the ZoneRipper as a music source using the following instructions:
1) If not already done, install the Sonos desktop controller on your PC or Mac
2) Select the option “Setup Music Library…” off the “Music” menu in the desktop controller.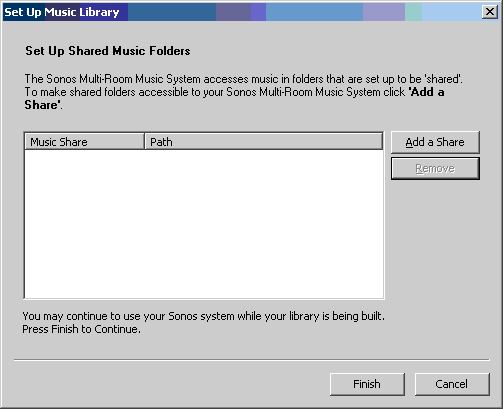
3) Click the “Add a Share” button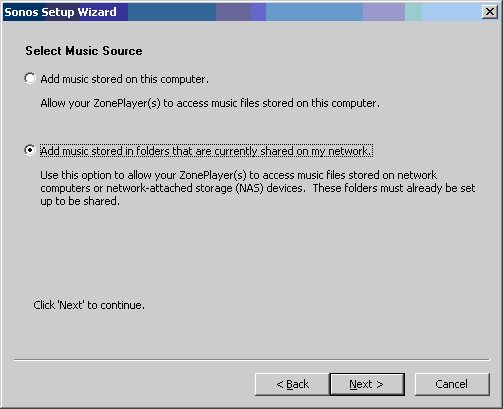
4) Click the “Add music stored in folders that are currently shared on my network.” as shown.
5) Click “Next”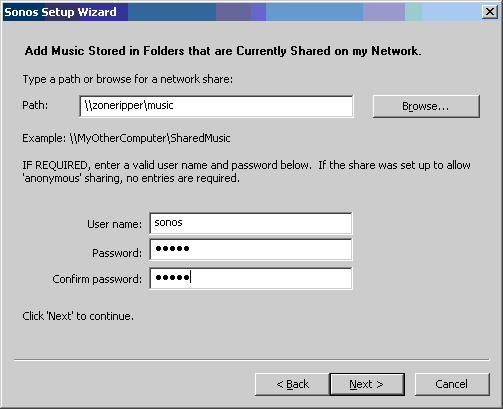
6) Enter \\zoneripper\Music for the Path, username is sonos and password is also sonos
7) Click “Next”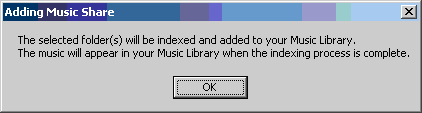
8) You should see the above confirmation message and return to the original music library setup screen – with an entry for the ZoneRipper as shown.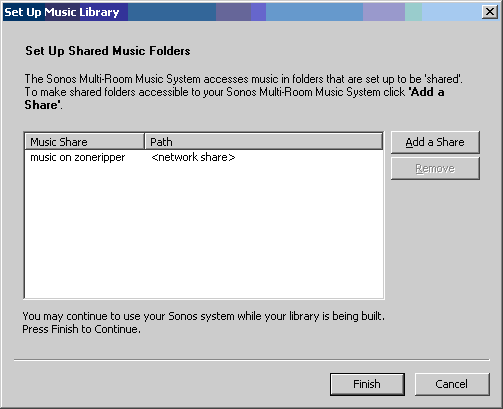
9) Click “Finish”
10) Any content on the ZoneRipper will then be available to play via the Sonos system once the index has completed (indicated in the bottom left of the desktop controller screen).
Scheduling Index Updates
It is recommended that you configure the Sonos system to check for new music every 24 hours.
1) Select the option “Schecdule Music Index Updates….” off the “Music” menu in the Sonos Desktop Controller.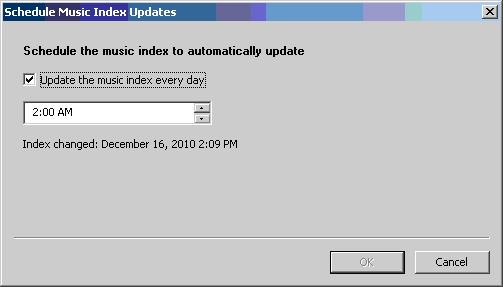
2) Ensure the “Update the music index every day” is checked and modify the update time as required.
Manually updating the Sonos Music Index
Music recently ripped using the ZoneRipper will become available the next time the Sonos Music Index update is scheduled. You may force an immediate update:
1) Select the option “Update Music Index Now” off the “Music” menu in the Sonos Desktop Controller.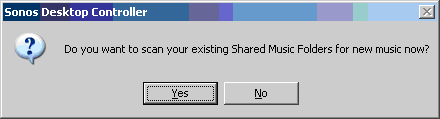
2) Click “Yes” when prompted to scan Shared Music Folders.
3) The Desktop controller will display when the scan has completed in the lower left hand corner.